Install Gatsby
if you’re a beginner you should follow the getting start from Gatsby
https://www.gatsbyjs.org/docs/quick-start/
I’ll skip this step because it’s too easy just follow the guide
># Install the Gatsby CLI
npm install -g gatsby-cli

# Create a new site
gatsby new gatsby-site

# Change directories into site folder
cd gatsby-site

# gatsby develop
gatsby develop
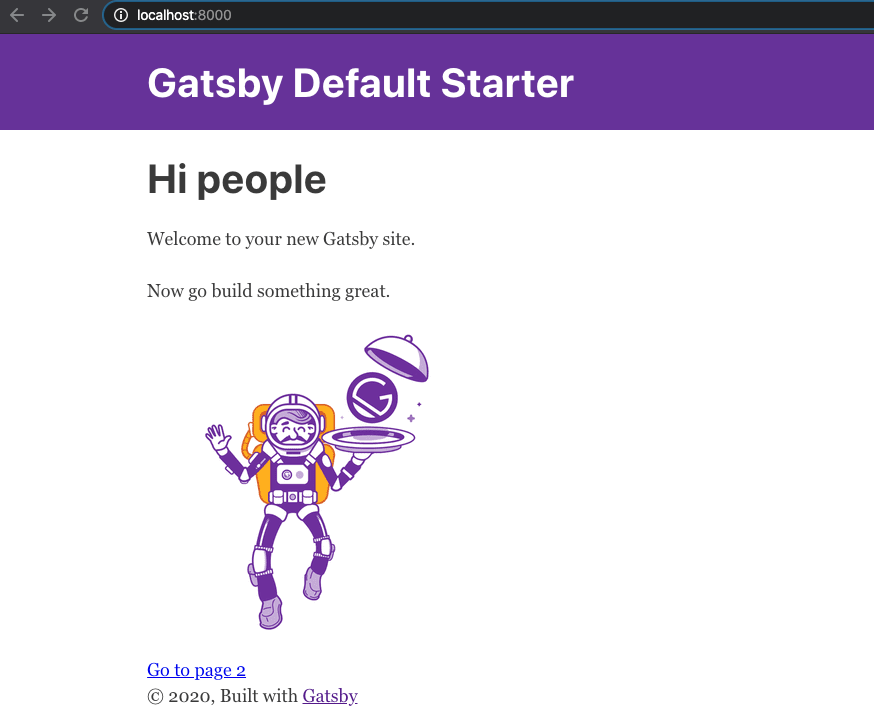
now you’ll get the Gatsby default page
Add TypeScript support
Install gatsby-plugin-typescript and typeScript dependencies
>npm install gatsby-plugin-typescript
npm install -D typescript
Change all .js file to .tsx
Add “gatsby-plugin-typescript” to gatsby-config.js
>plugins: [`gatsby-plugin-typescript`]
Add typescript eslint
new files tsconfig.json and .eslintrc.js to the root project directory
To generate tsconfig.json you can use this script to generate a sample config
>./node_modules/typescript/bin/tsc --init
tsconfig.json
>{
  "compilerOptions": {
    "module": "commonjs",
    "target": "esnext",
    "jsx": "preserve",
    "lib": ["dom", "esnext"],
    "strict": true,
    "noEmit": true,
    "isolatedModules": true,
    "esModuleInterop": true,
    "noUnusedLocals": false,
    "allowJs": true
  },
  "exclude": ["node_modules", "public", ".cache"]
}
edit .eslintrc.js
you can enable or disable rules as you want
>module.exports = {
  parser: '@typescript-eslint/parser', // Specifies the ESLint parser
  extends: [
    'eslint:recommended',
    'plugin:react/recommended',
    'plugin:@typescript-eslint/recommended',
    'prettier/@typescript-eslint',
    'plugin:prettier/recommended'
  ],
  settings: {
    react: {
      version: 'detect'
    }
  },
  env: {
    browser: true,
    node: true,
    es6: true
  },
  plugins: ['@typescript-eslint', 'react'],
  parserOptions: {
    ecmaFeatures: {
      jsx: true
    },
    ecmaVersion: 2018, // Allows for the parsing of modern ECMAScript features
    sourceType: 'module' // Allows for the use of imports
  },
  rules: {
    'react/prop-types': 'off', // Disable prop-types as we use TypeScript for type checking
    '@typescript-eslint/explicit-function-return-type': 'off'
  },
  overrides: [
    // Override some TypeScript rules just for .js files
    {
      files: ['*.js'],
      rules: {
        '@typescript-eslint/no-var-requires': 'off'
      }
    }
  ]
};
Install eslint and typescript packages to dev dependencies
>npm install -D @typescript-eslint/eslint-plugin @typescript-eslint/parser eslint
Now you need to refactor all codes to fix TypeScript lint errors
Setup Progressive Web App
Install gatsby-plugin-manifest plugin to allow gatsby use Web App Manifest
Web App Manifest will allow users to save PWA app to the home screen
and it includes information like the Web App’s name, icons, start_url, background-color and more
>npm install gatsby-plugin-manifest
then you can config Web App Manifest in gatsby-config.js
>module.exports = {
  plugins: [
    {
      resolve: `gatsby-plugin-manifest`,
      options: {
        name: `gatsby-starter-default`,
        short_name: `starter`,
        start_url: `/`,
        background_color: `#663399`,
        theme_color: `#663399`,
        display: `minimal-ui`,
        icon: `src/images/gatsby-icon.png`, // This path is relative to the root of the site.
      },
    },
  ],
}
Add gatsby-plugin-offline to make the site work offline
>npm install --save gatsby-plugin-offline
Add gatsby-plugin-offline to plugins in gatsby-config.js
Gatsby will generate Service Worker to make it offline support and cache the page
you can read the available options to change the config
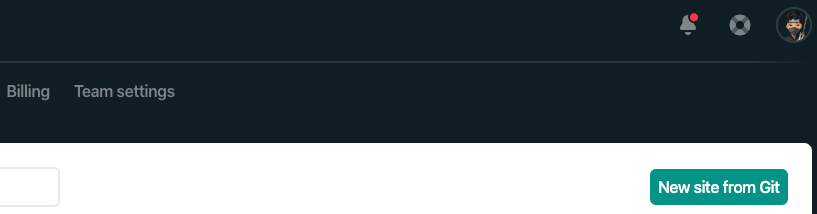
Deploy to Netlify
In your Netlify dashboard New site from Git
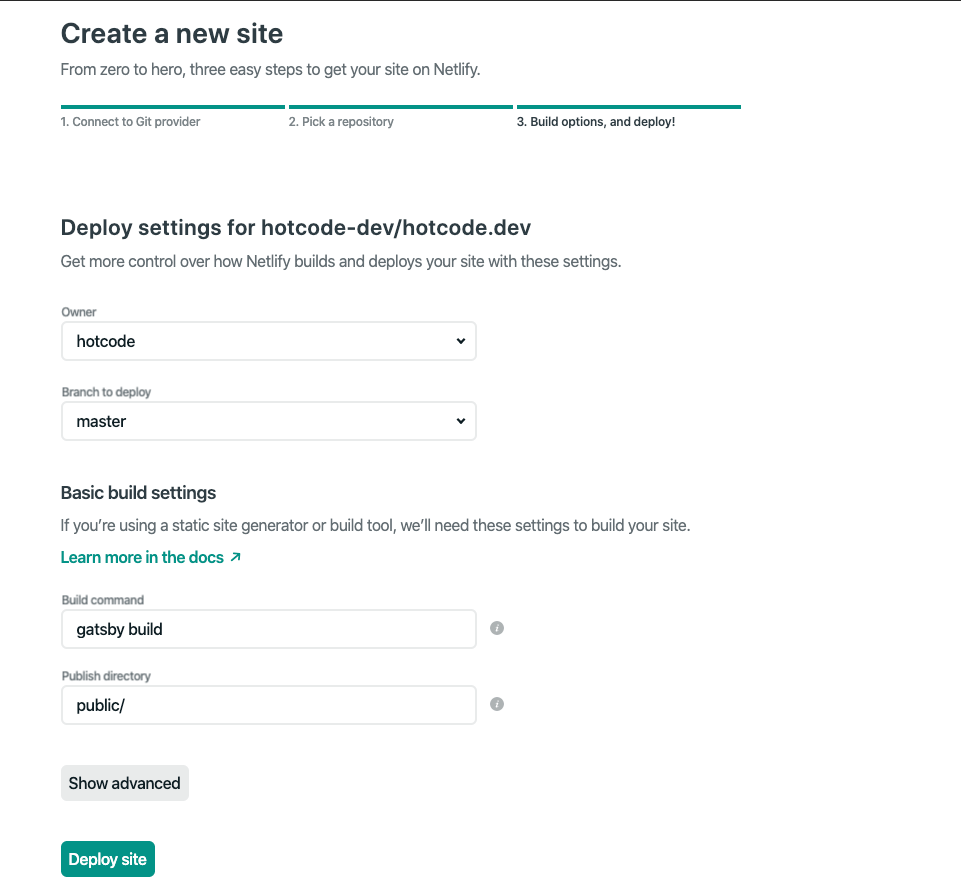
choose your repository in Github or Gitlab to deploy
and the default setting should work
set Build command to gatsby build
set Publish directory to public/
Finish!! the web will deploy to Netlify static host
The web will automatically deploy when you update the master branch
Audits Google Lighthouse score with Google Chrome
open inspect mode
go to audits tab
click generate report
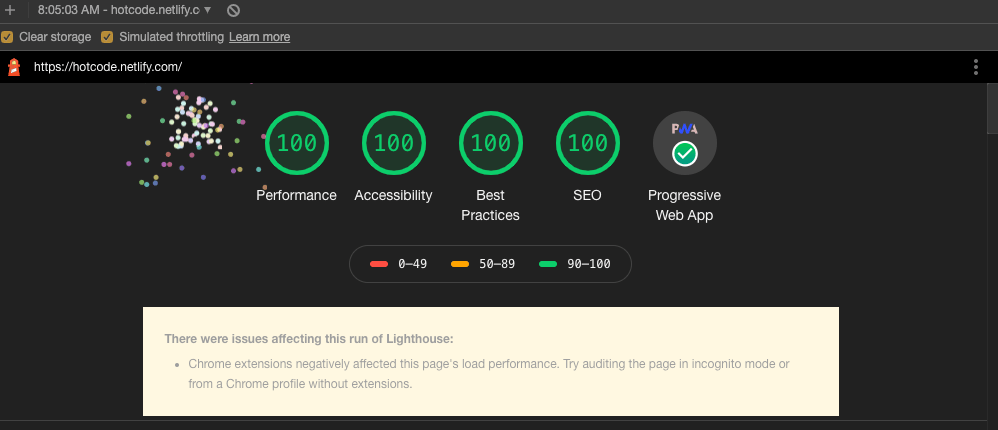
Wow! you get max score